Wi-Fi connection during installation:
Connecting your TouchOne to Wi-Fi is useful so you can get the latest software updates. To do this you can follow the instructions during the setup wizard.
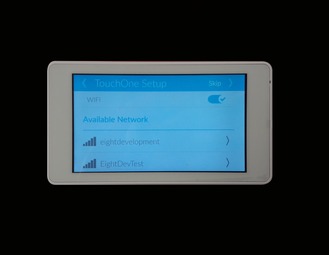
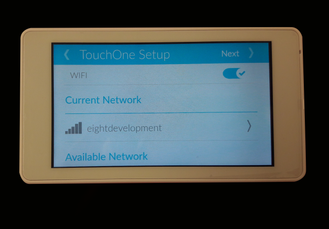
Once you reach the Wi-Fi screen of the installer menu, you will see a list of available networks.
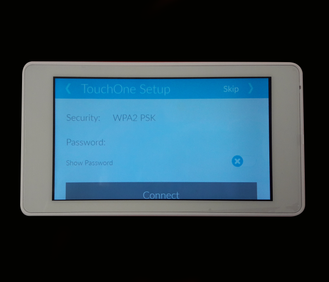
Choose the network that you want to connect to. This will bring a up screen where you will need to enter the password for that network, and press connect.
Once you have successfully connected to the network, you will see this screen displaying the current network the TouchOne is connected to.
At this point during the installer wizard’s process, the TouchOne will check to see if there are any software updates available.
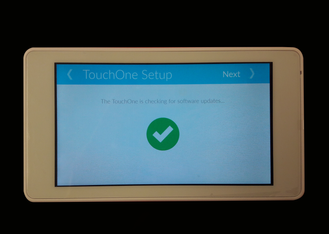
The TouchOne is successfully connected to Wi-Fi and up to date.
Wi-Fi connection through settings menu:
If you did not connect to Wi-Fi during the installation process you can do so through the settings menu.
Press the settings button from the home screen. Scroll down until you see the Touchscreen Settings heading. Find and press the Wifi button.
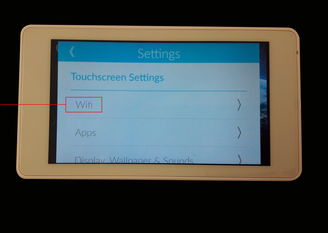
This will bring up the same screen with the list of networks as seen above in the installation process. Follow the same steps to connect to a network.
Setting the time:
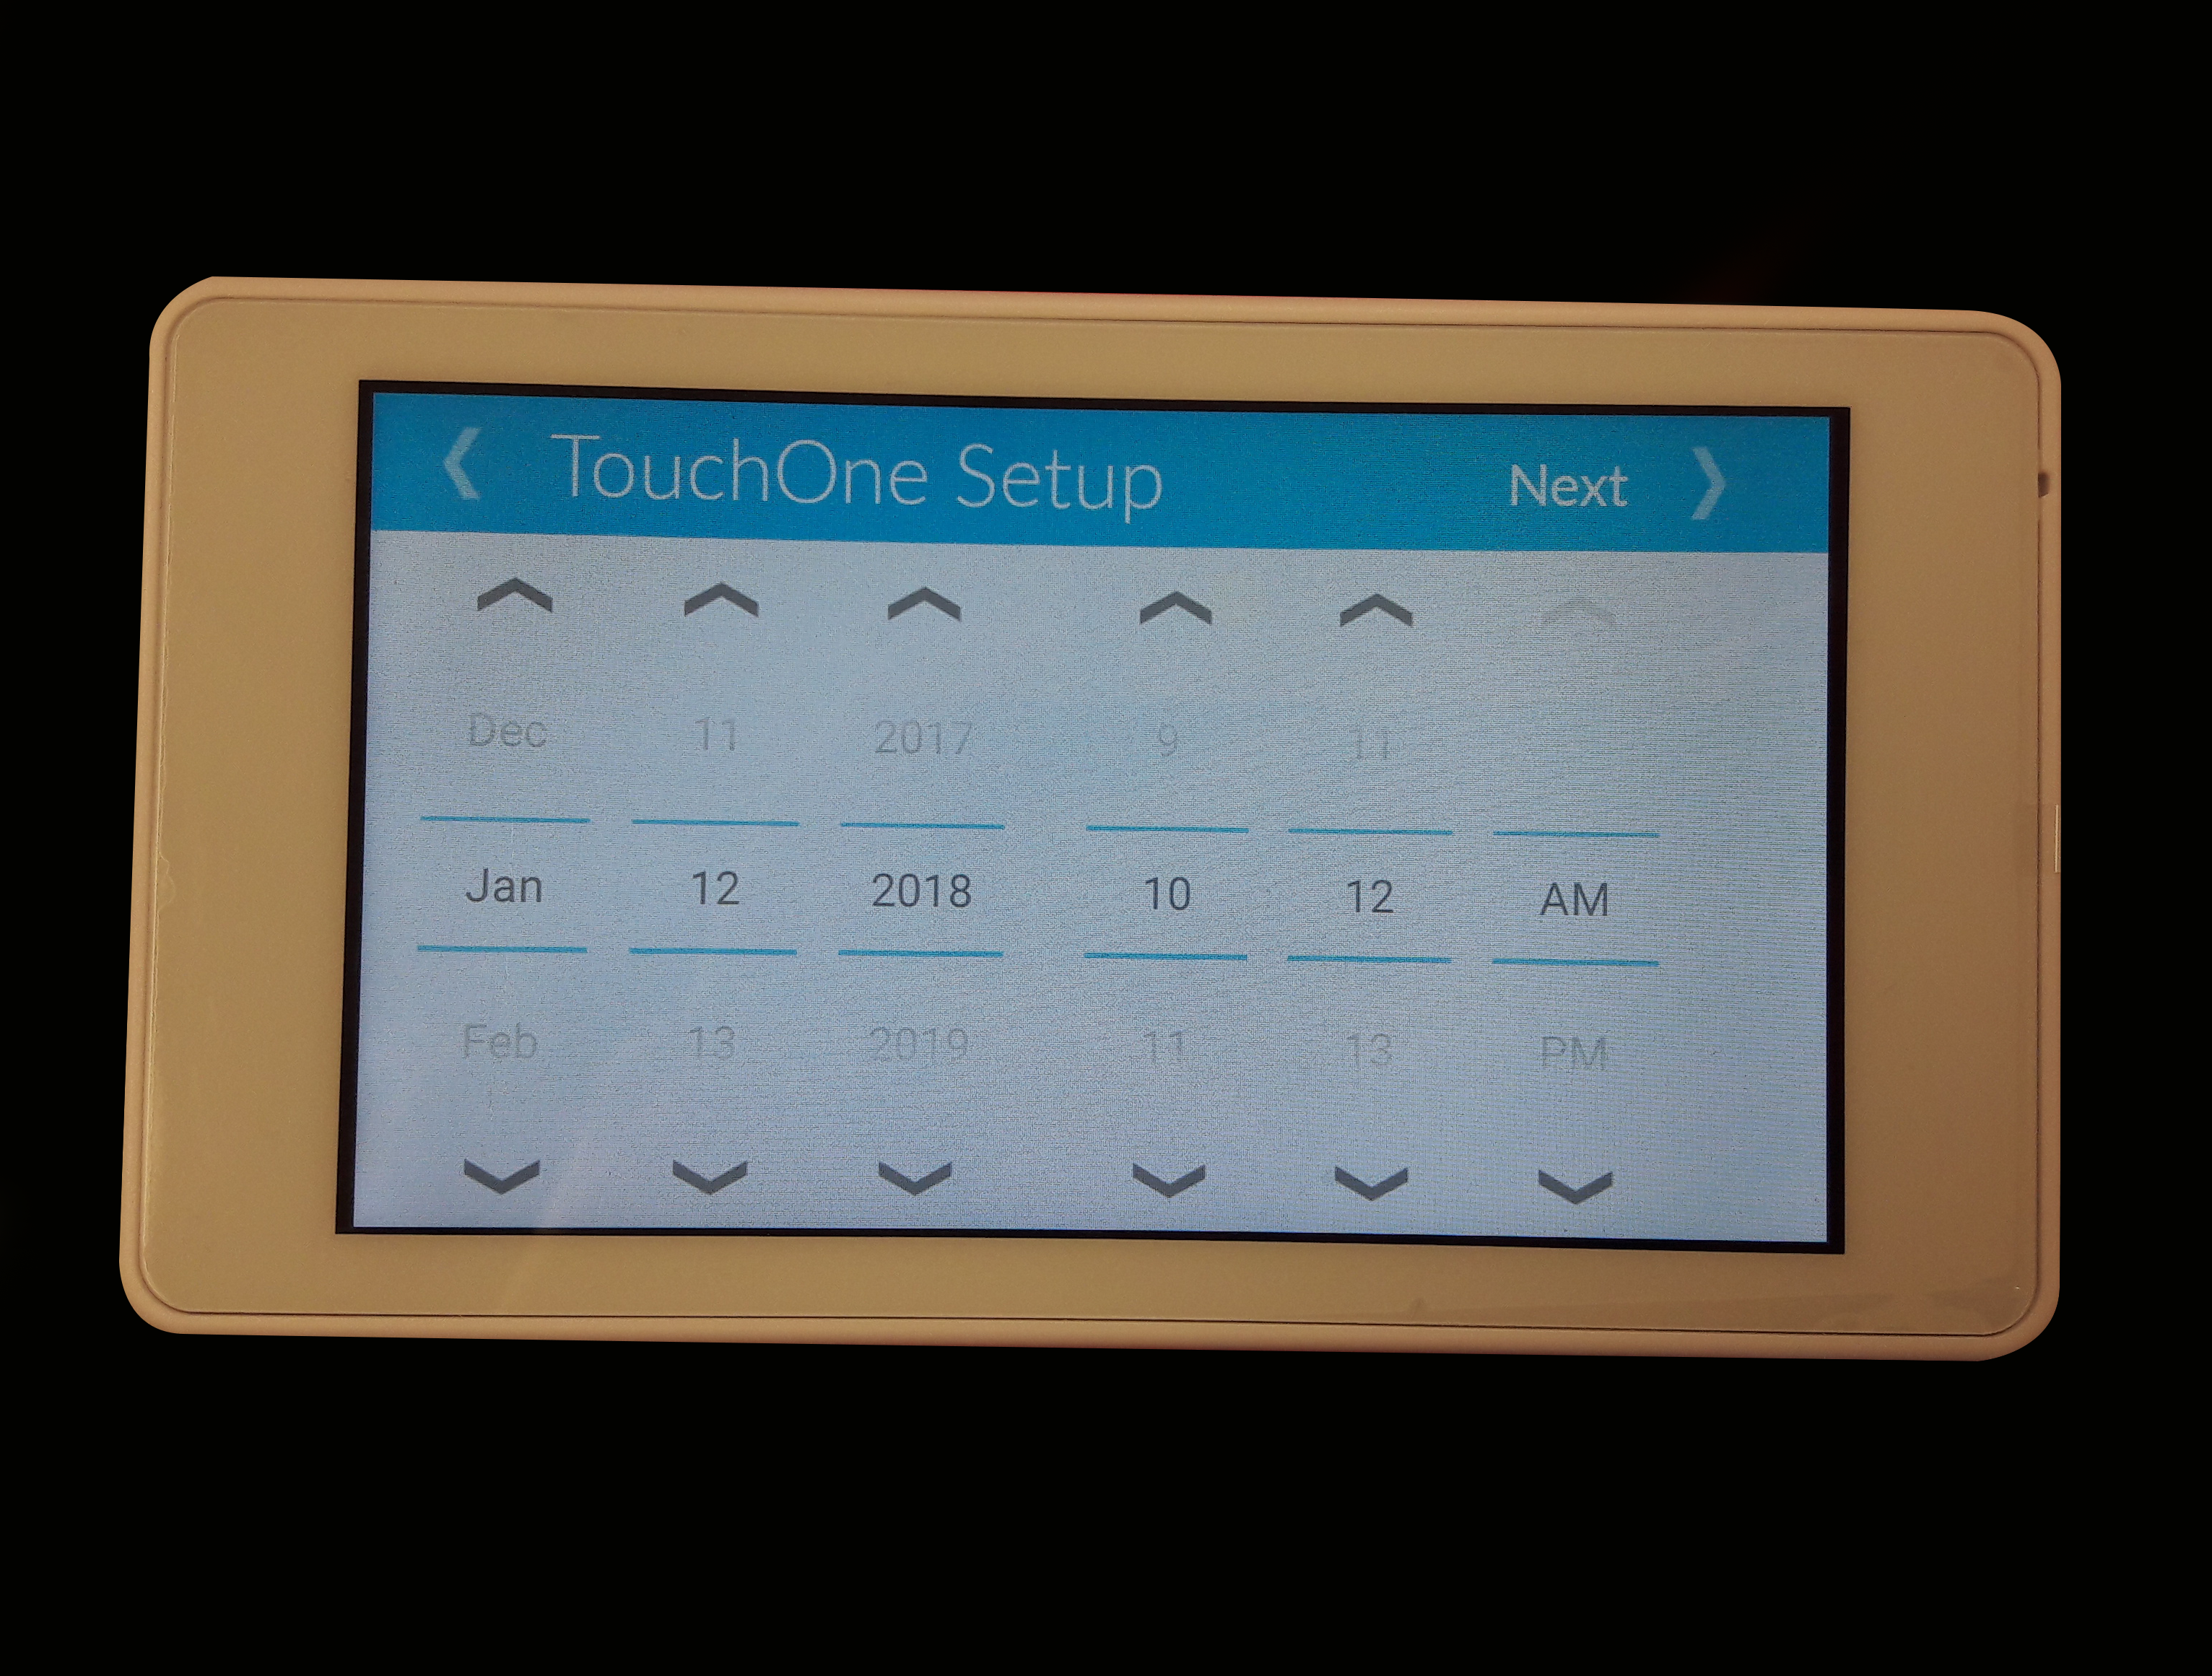
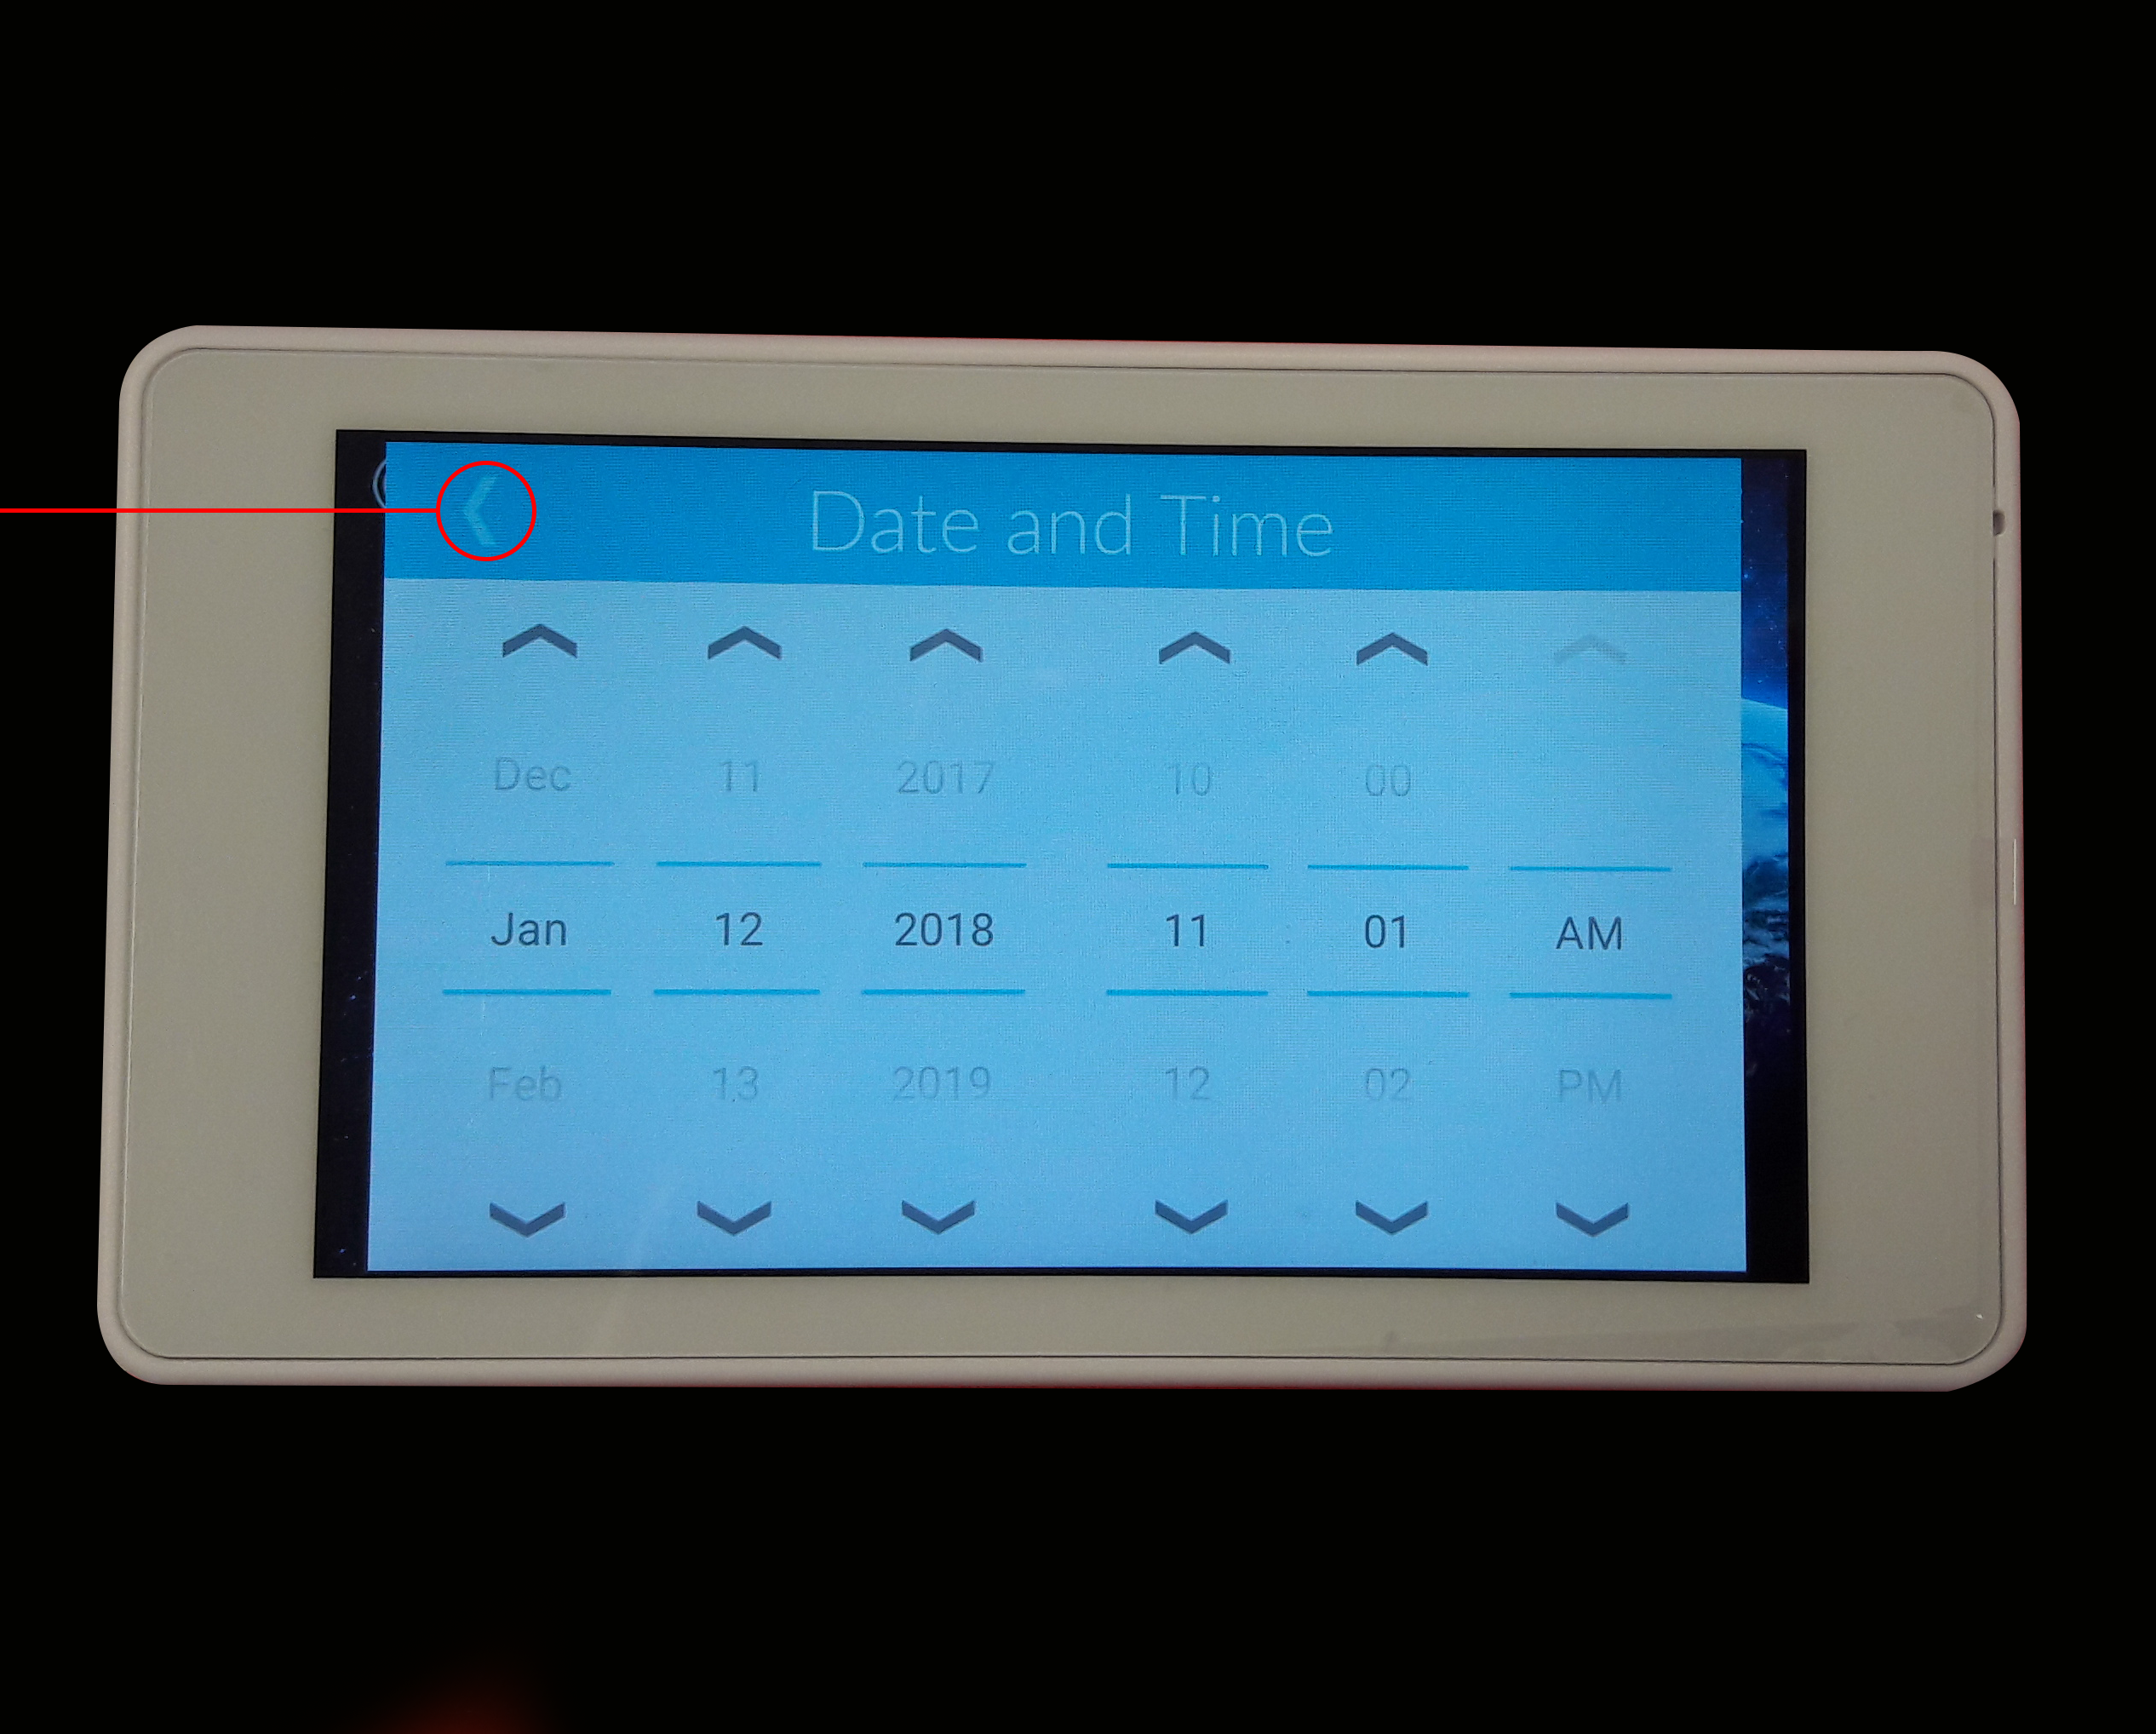
Setting the time can be done during the installation process. As you proceed you will come to a screen asking you to set the date and time. Each part of the date and time can be altered by scrolling up or down as indicated by the arrows. Once the correct date and time is displaying press the Next button.
The time can also be changed in the settings menu. Press the Settings button from the home screen. Under Alarm Settings you will see Date and Time.
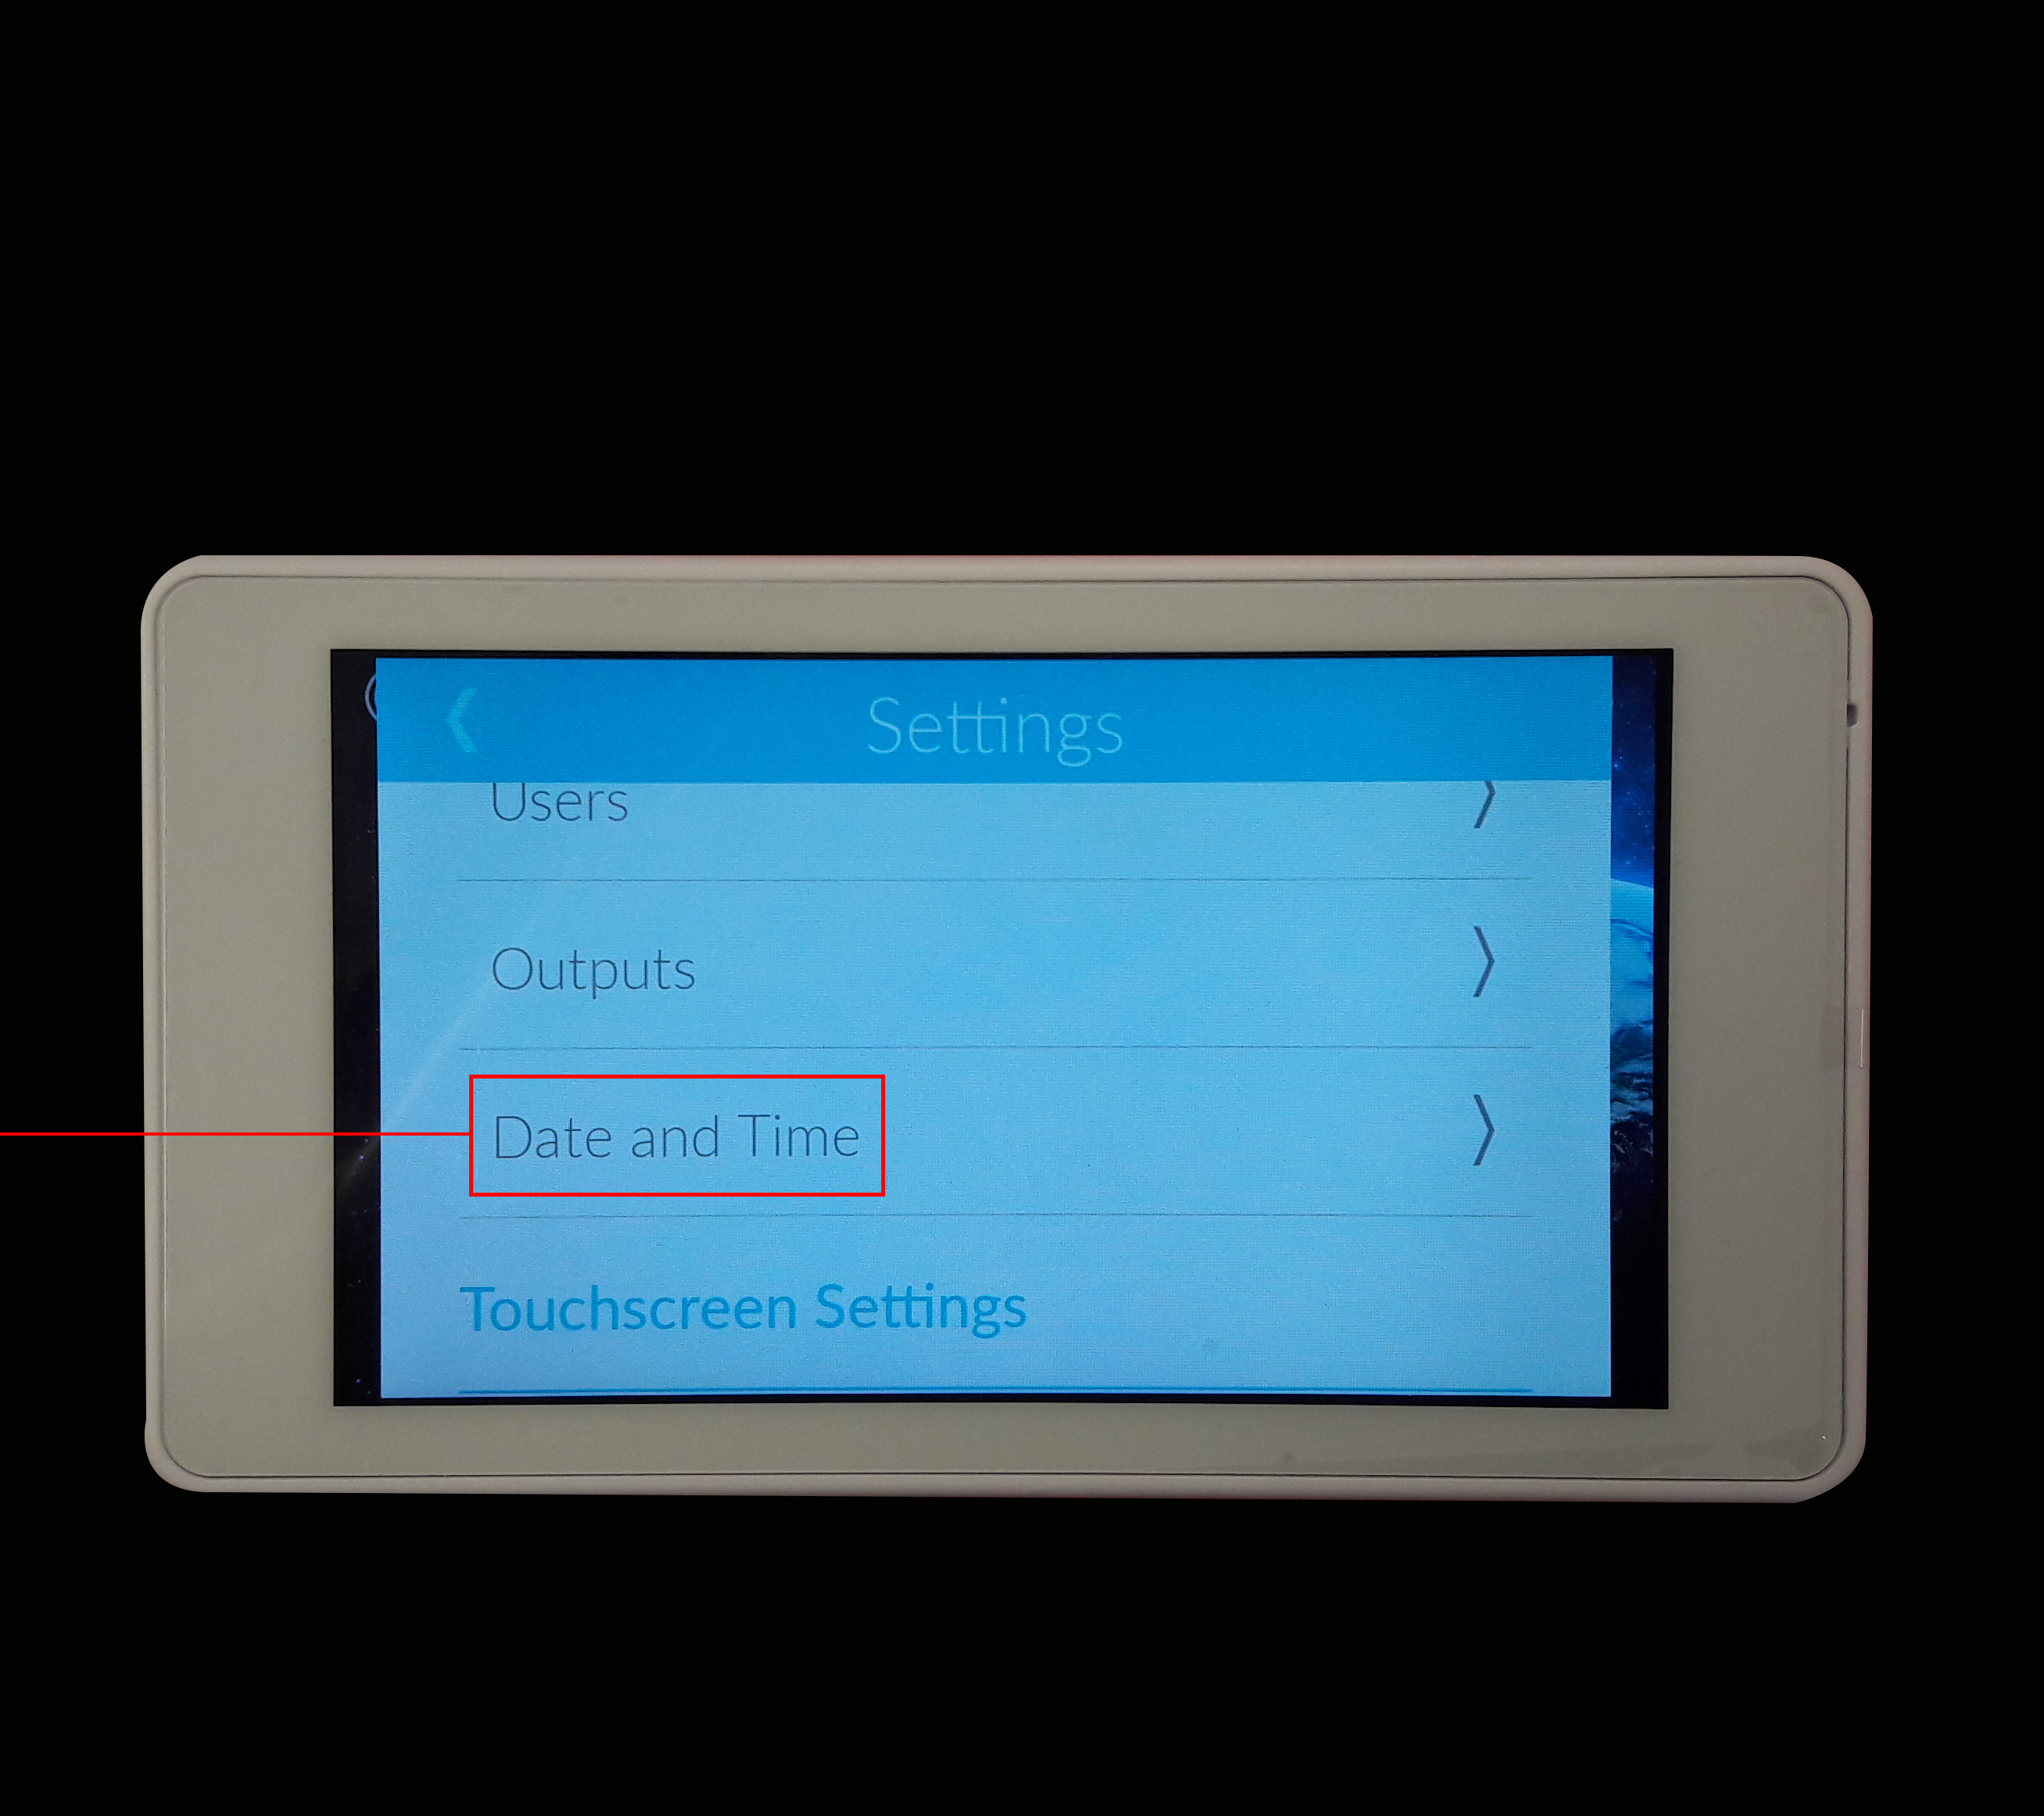
Press this option, the TouchOne will request the master pin. Once entered it will take you to a similar screen as above. Scroll each part of the date and time until it is correct, then press the back button to save the changes.
Bluetooth Pairing:
To pair a smart phone with your TouchOne ensure that bluetooth is turned on on your mobile device, then press the Settings button from the home screen.
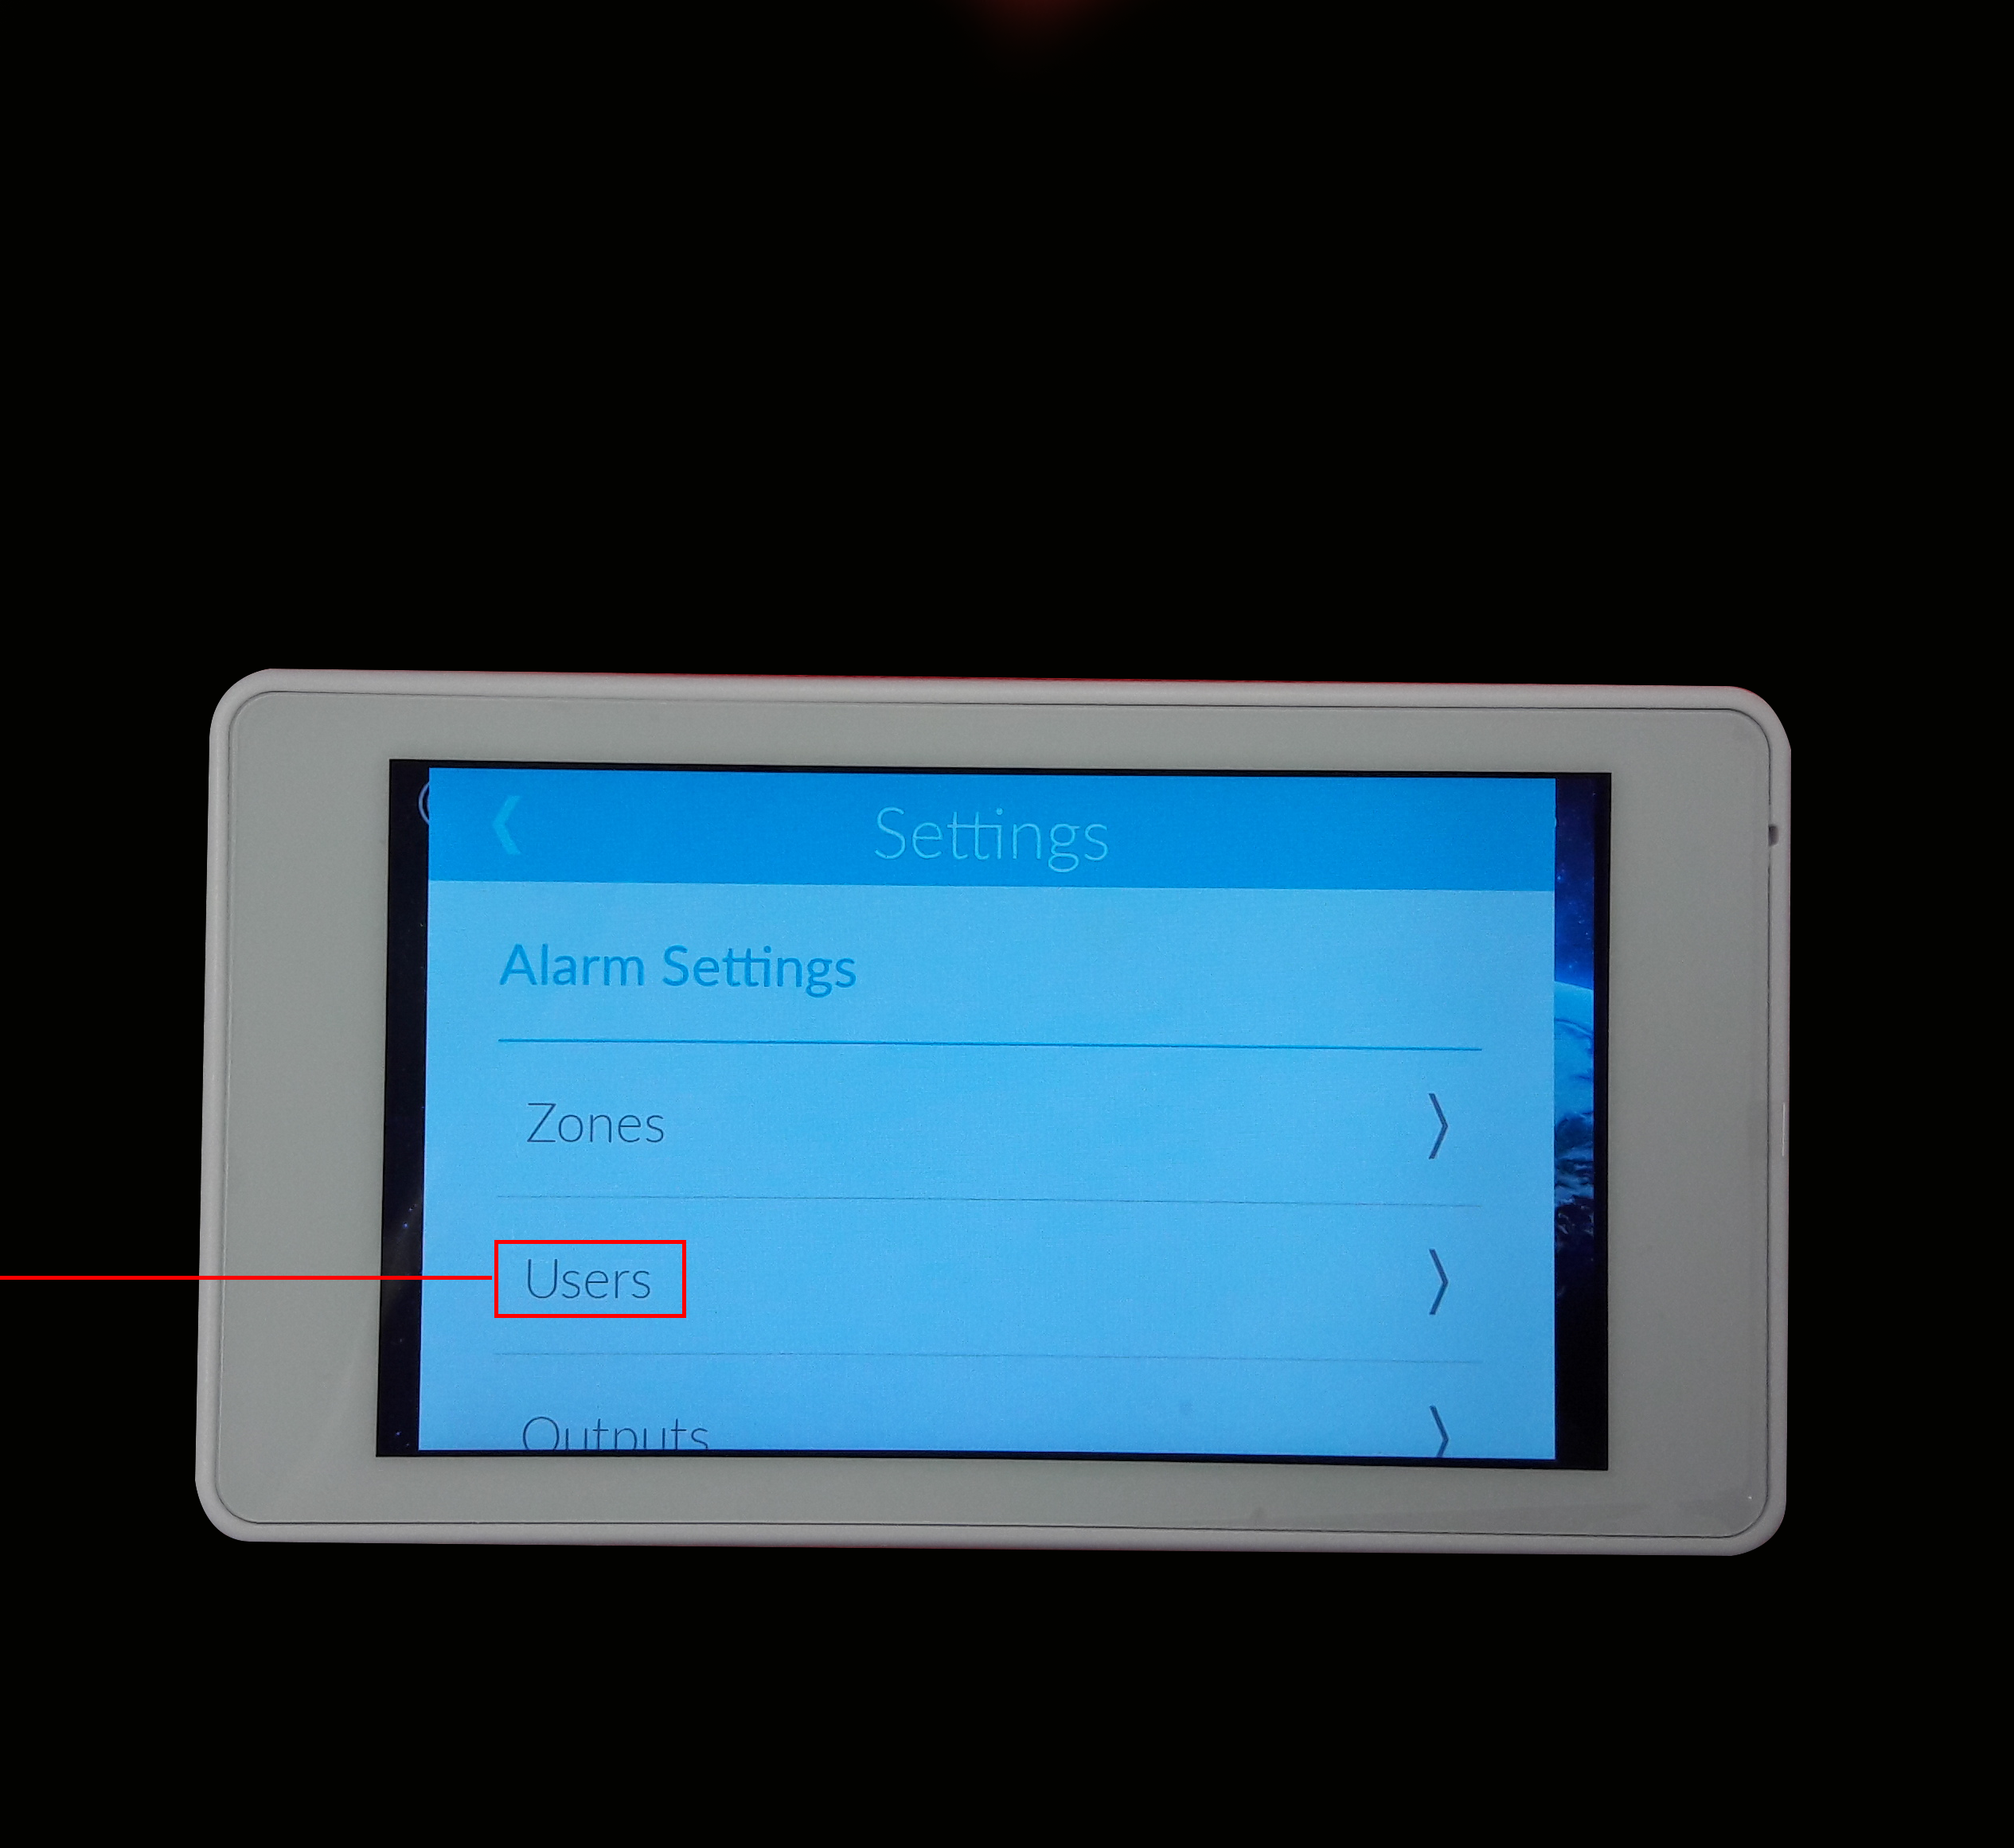
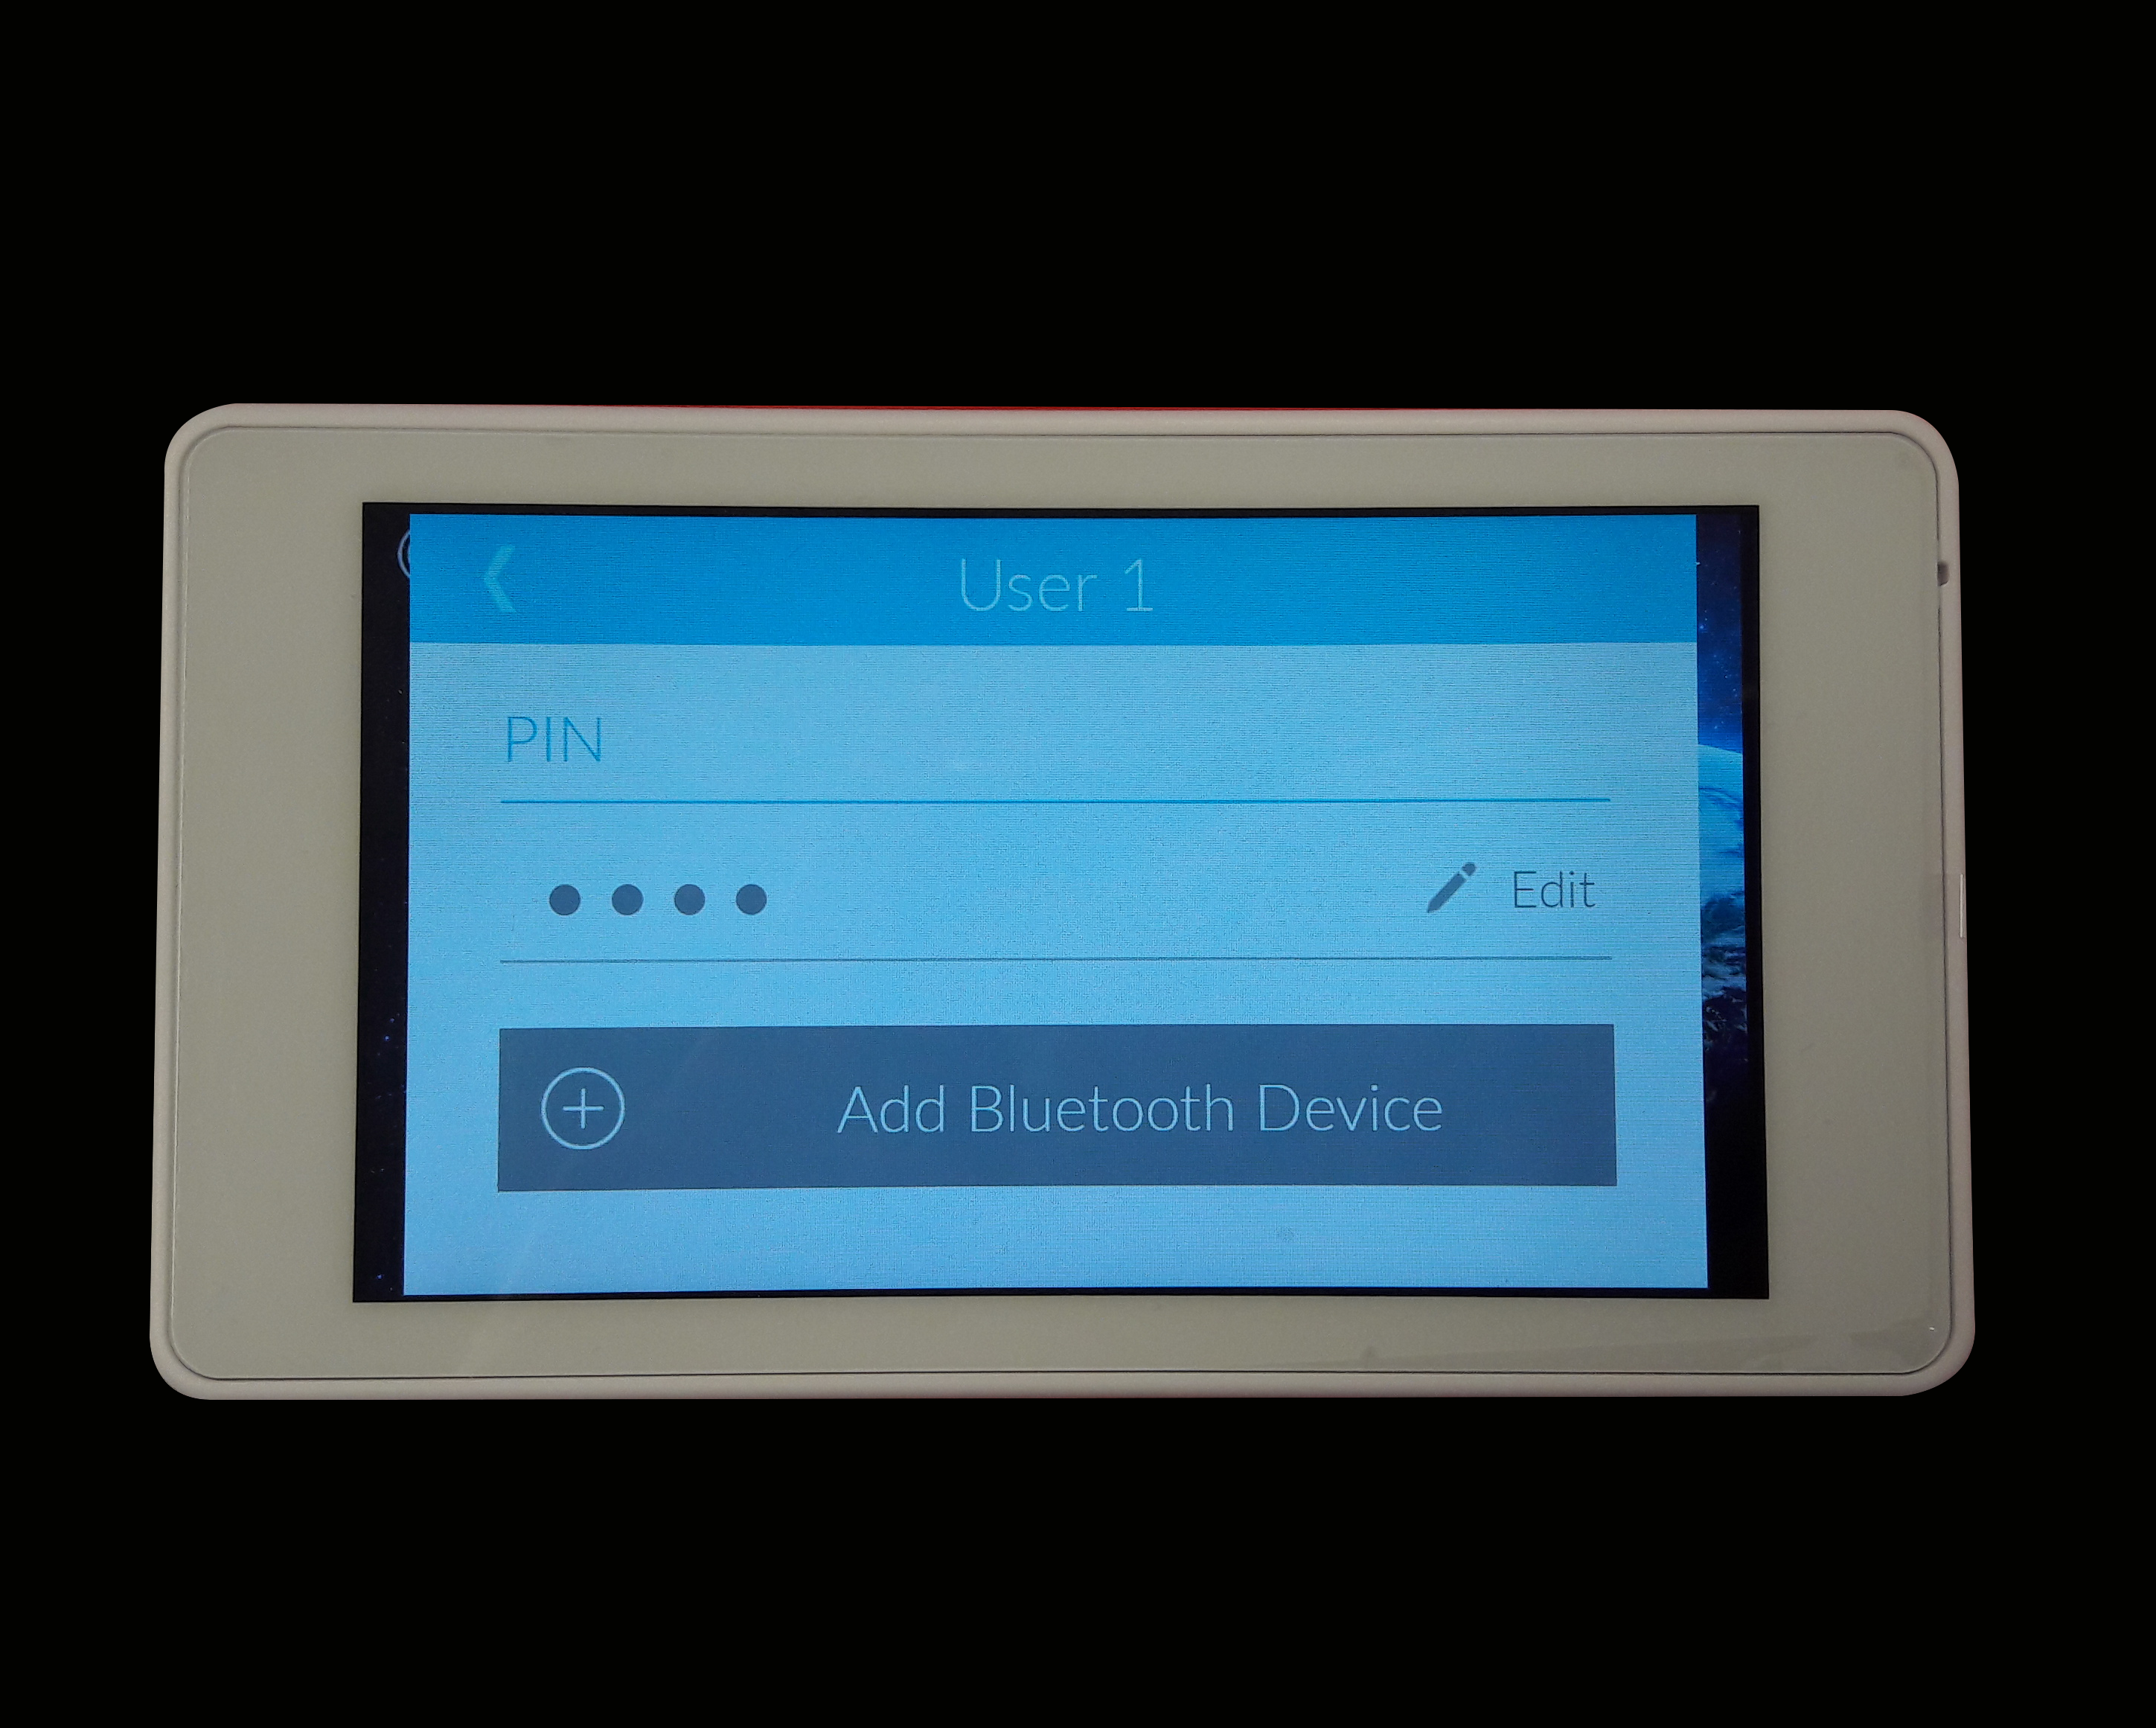
Press the Users button, then enter the requested master pin, you should now see a list of users.
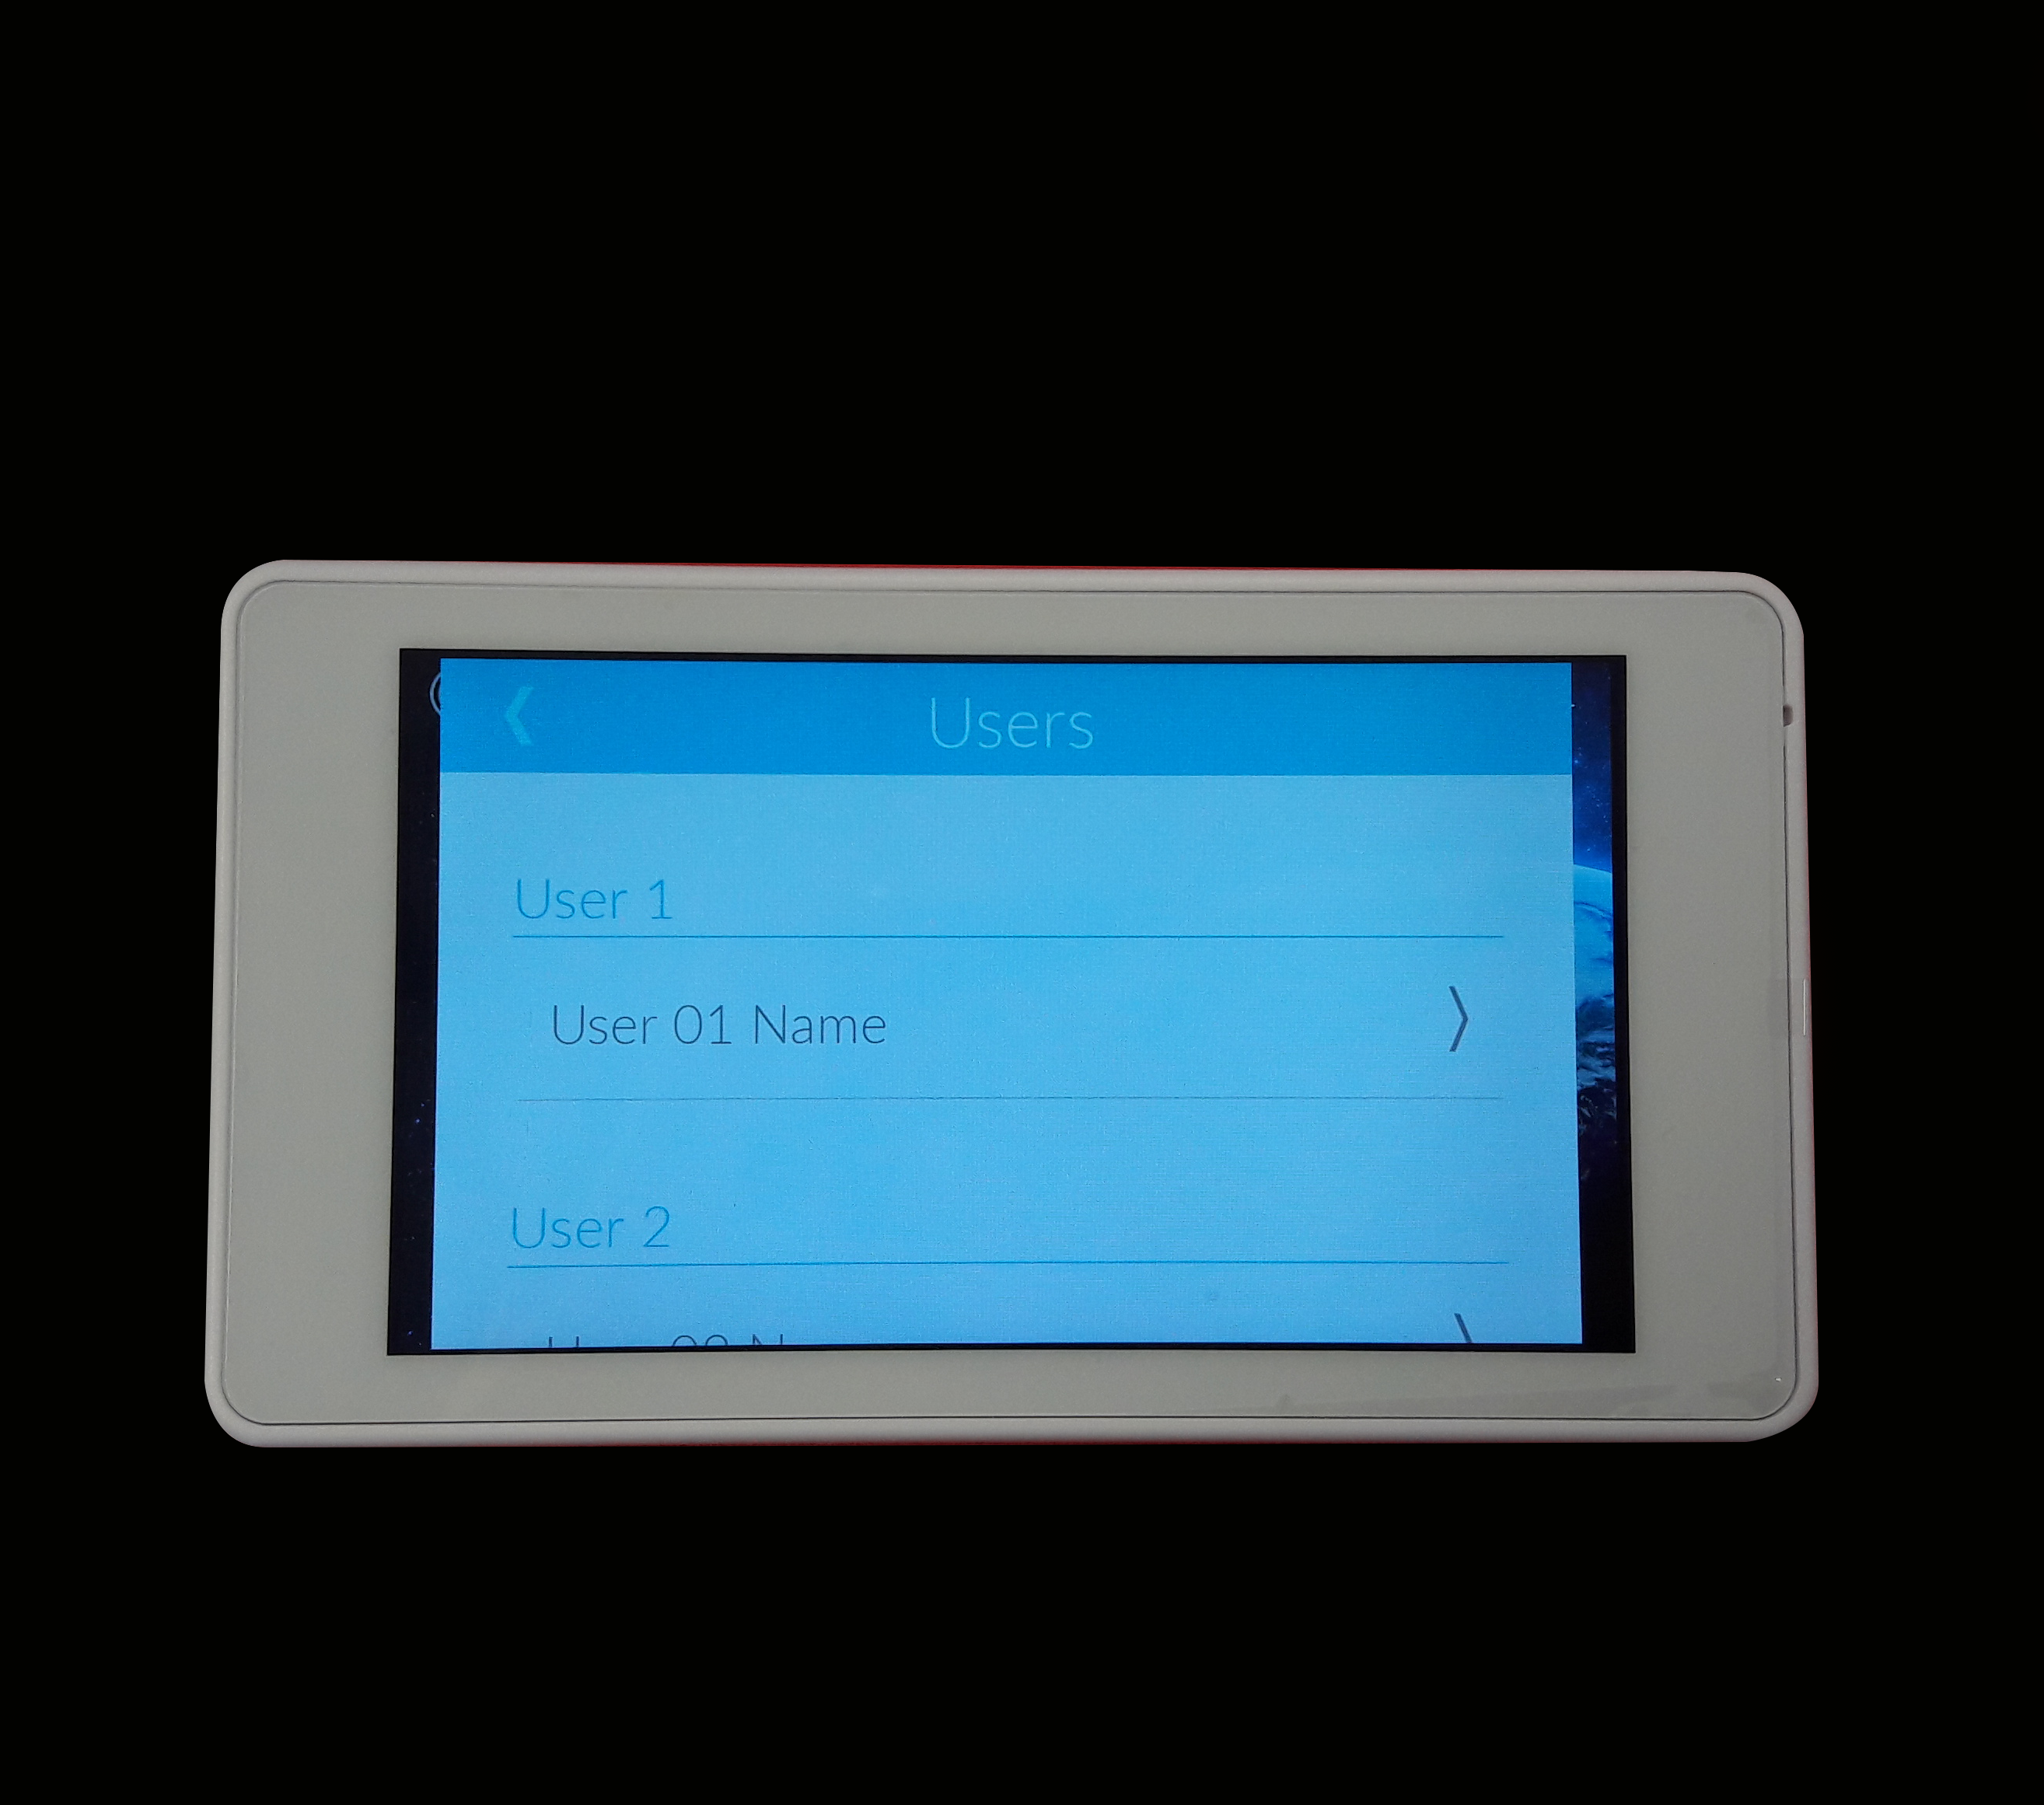
Select the user you wish to pair the mobile device with. You will now see a button Add Bluetooth Device.
Once this button is pressed it will bring up a list of bluetooth devices. Choose your device, and enter the master pin. You will now see a pop up screen with a pairing code on it. This same pairing code should appear on your mobile device.
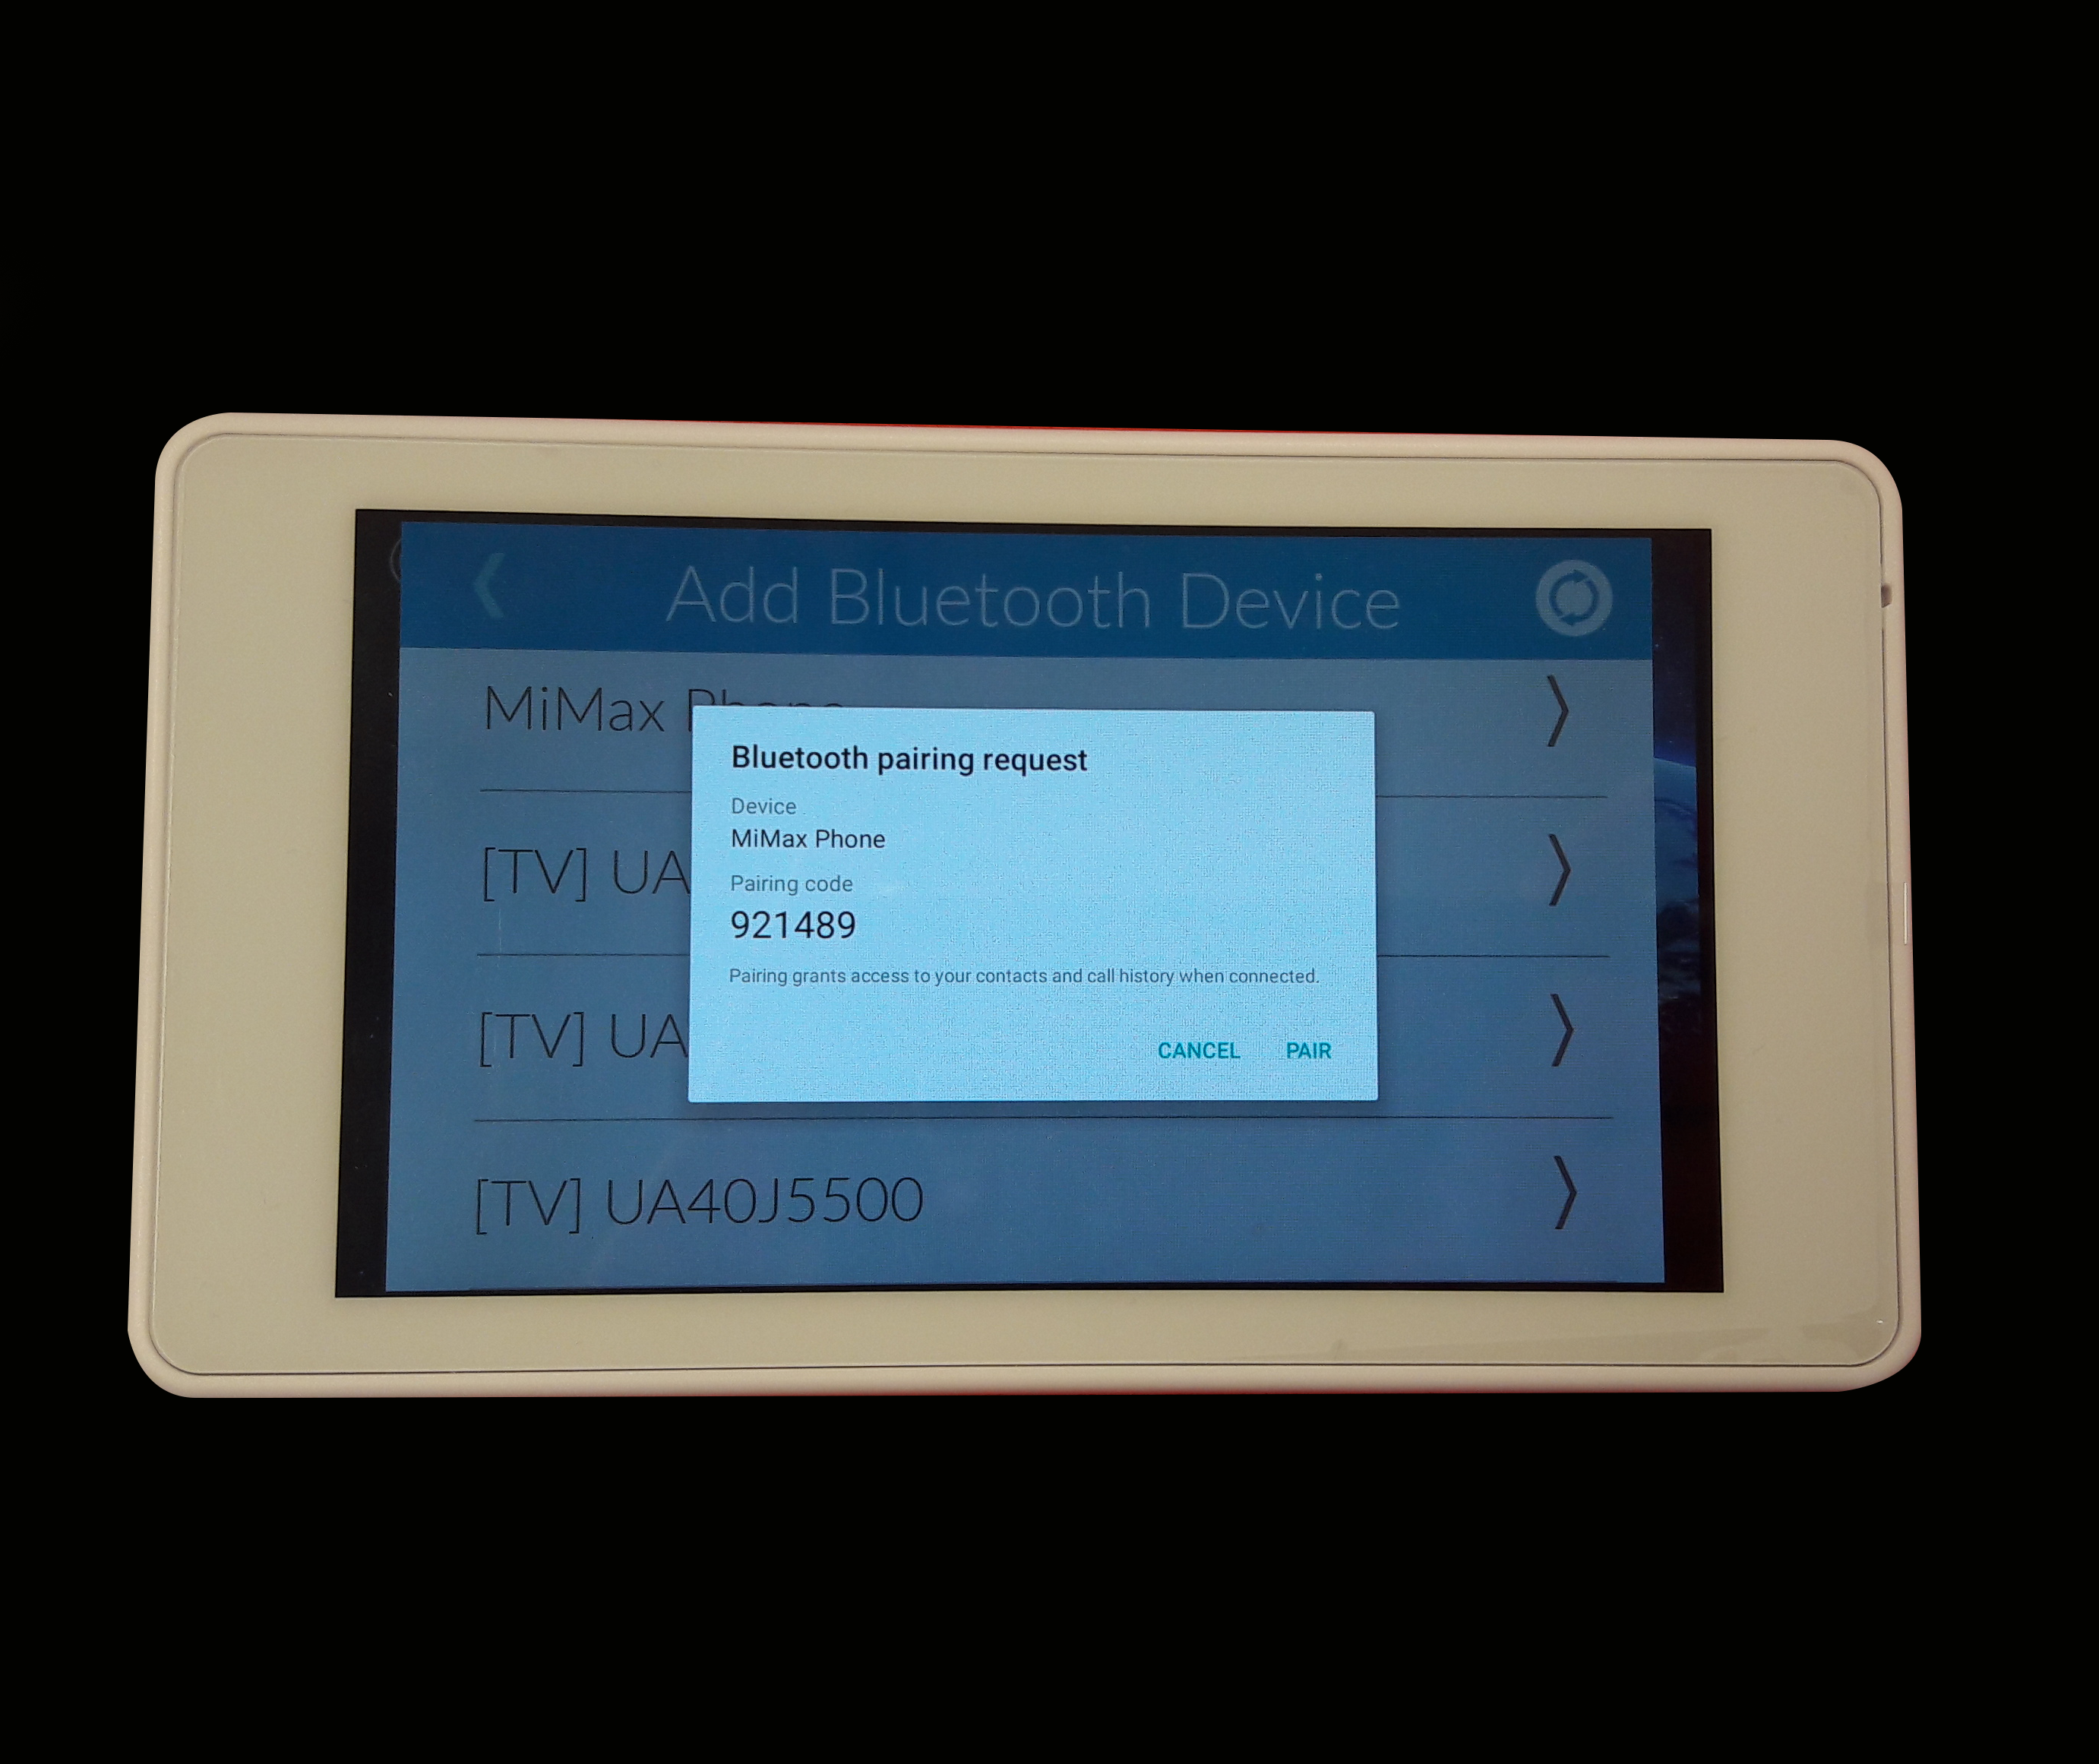
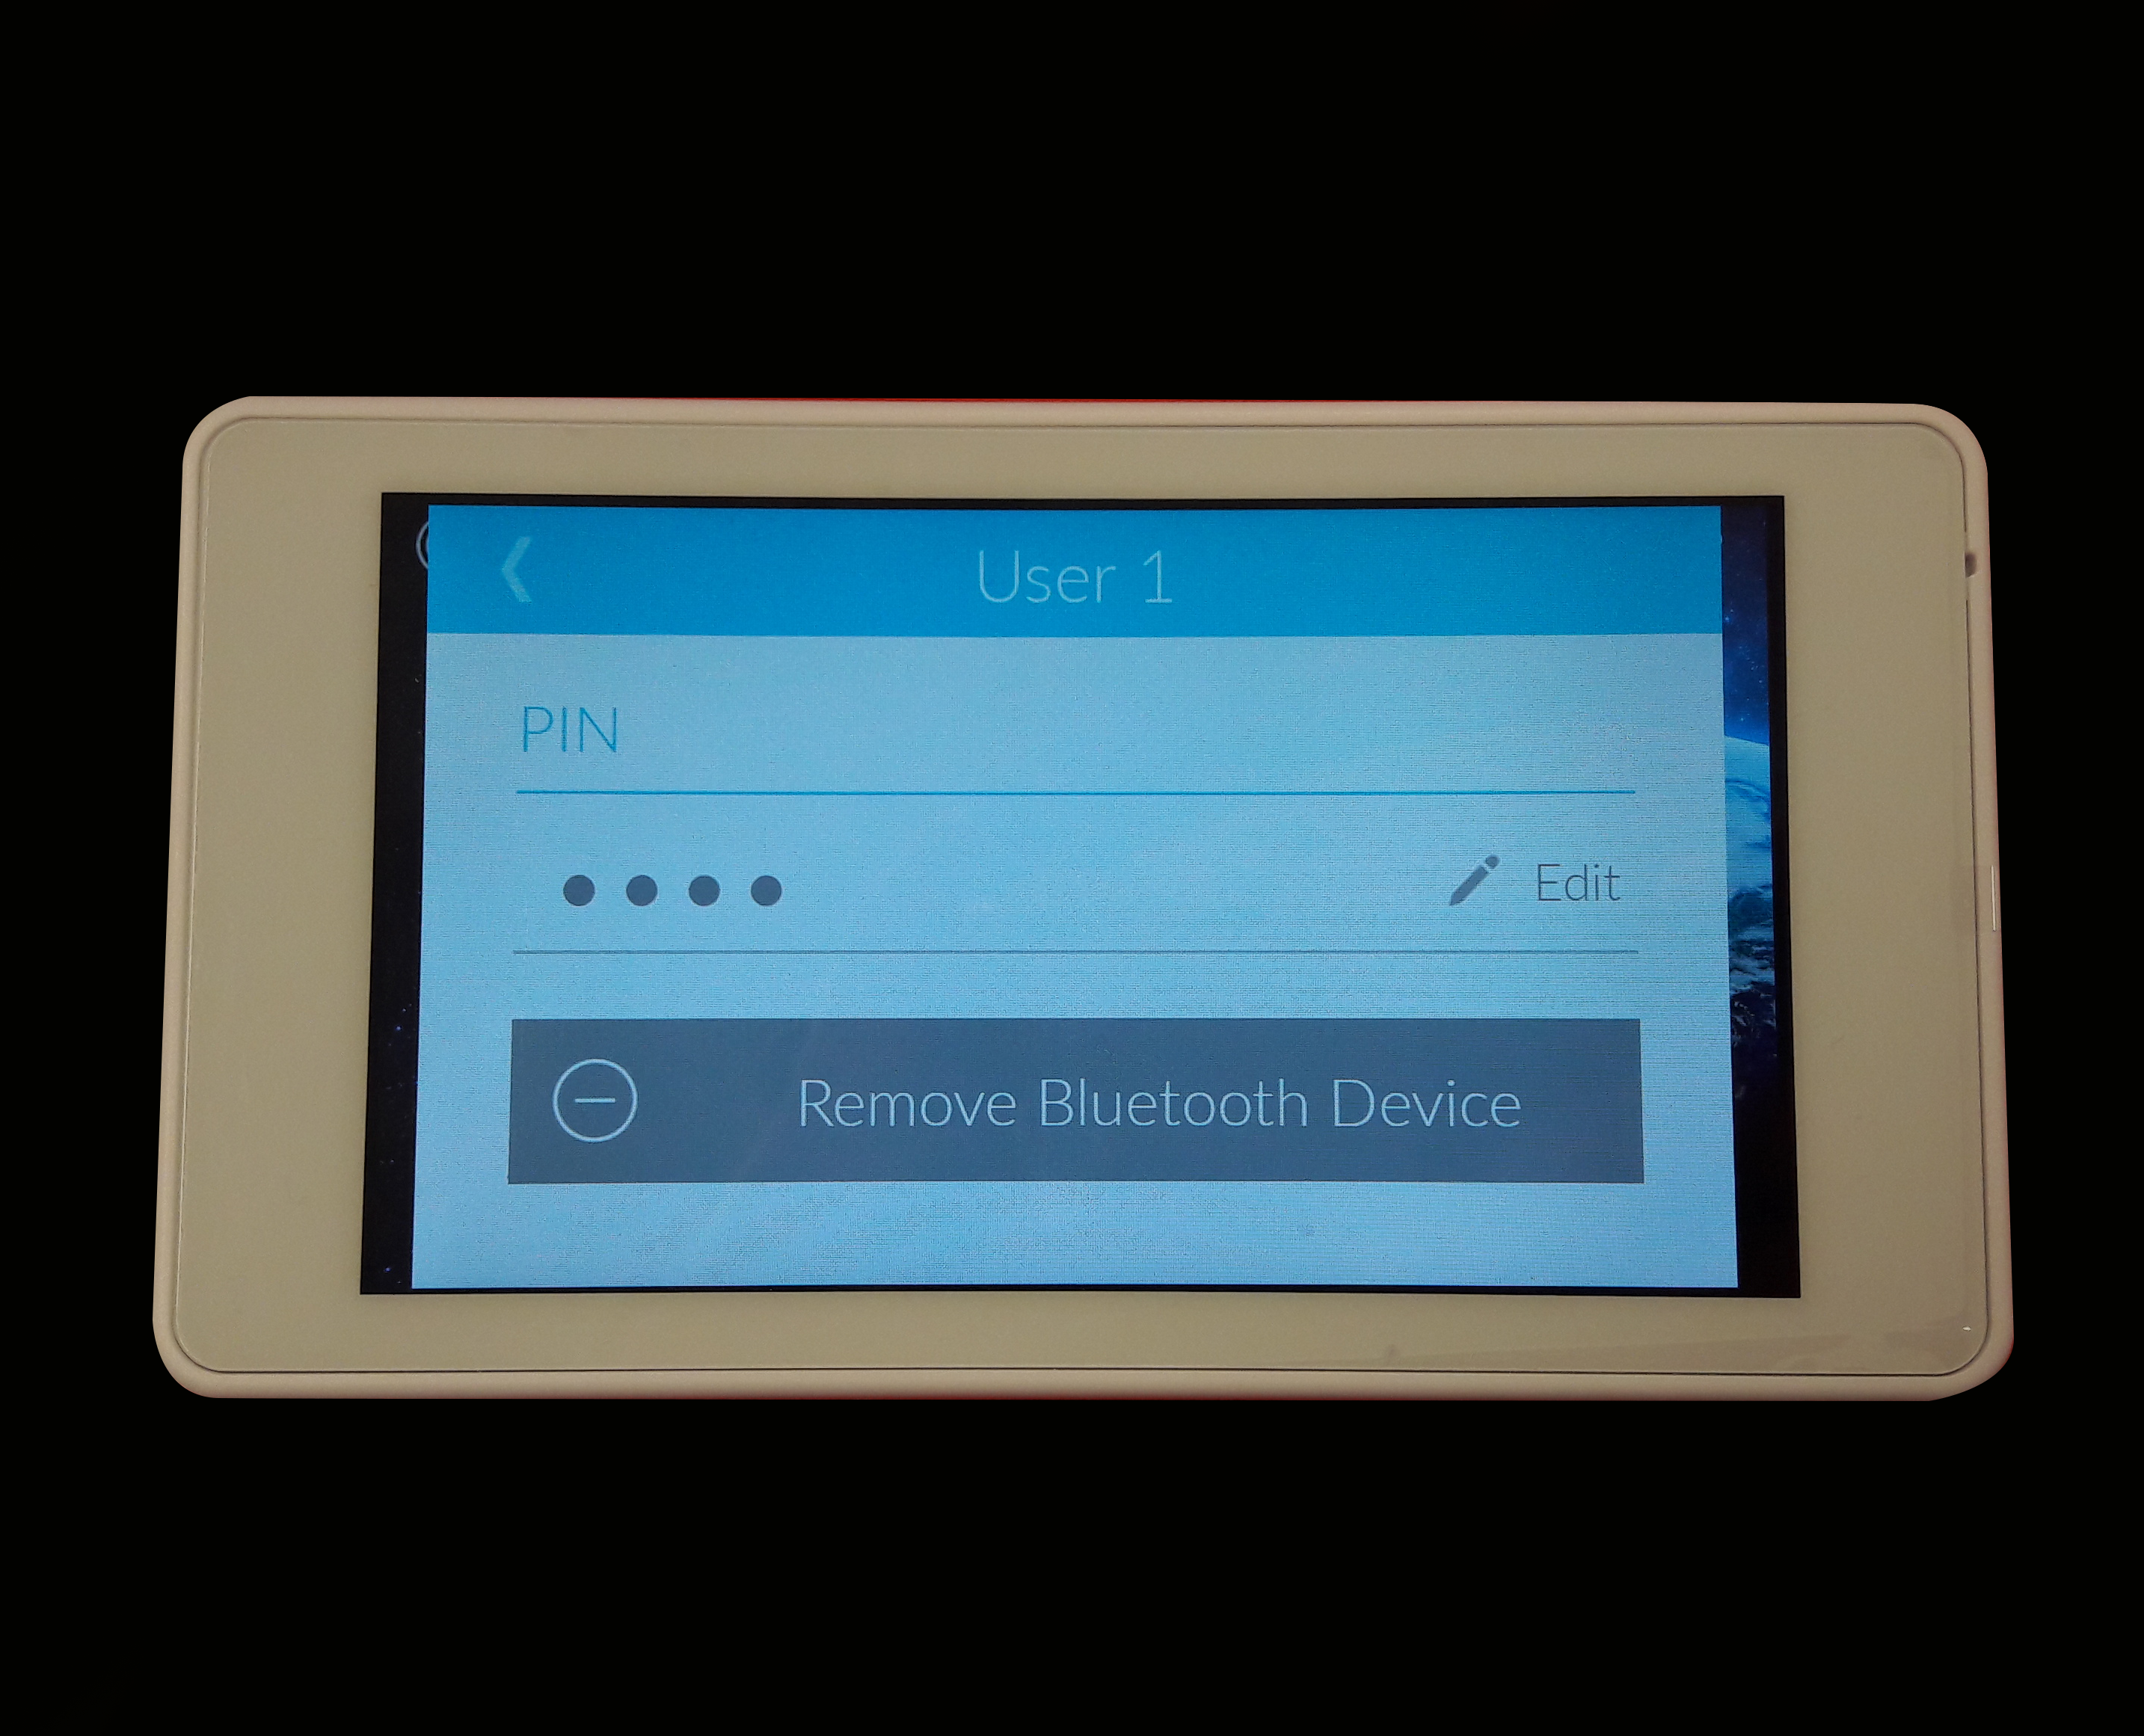
Press pair on the TouchOne as well as the mobile device if required. The mobile device is now successfully paired with the TouchOne. You should see Remove Bluetooth Device where it previoulsy said Add Bluetooth Device.
Over the Air software update:
Over the air updates allow you to keep your TouchOne up to date with the latest version of software. To do this, you will need to have the TouchOne connected to a Wi-Fi network. Your first chance to perform an over the air update is during the installation wizard set up process. Once you have set the date and time, and then connected to a Wi-Fi network, the TouchOne will automatically check to see if there is a new version of software. If there is, it will prompt you to install the update, you have the choice to skip this process, however, it is recommended that you do install the update.
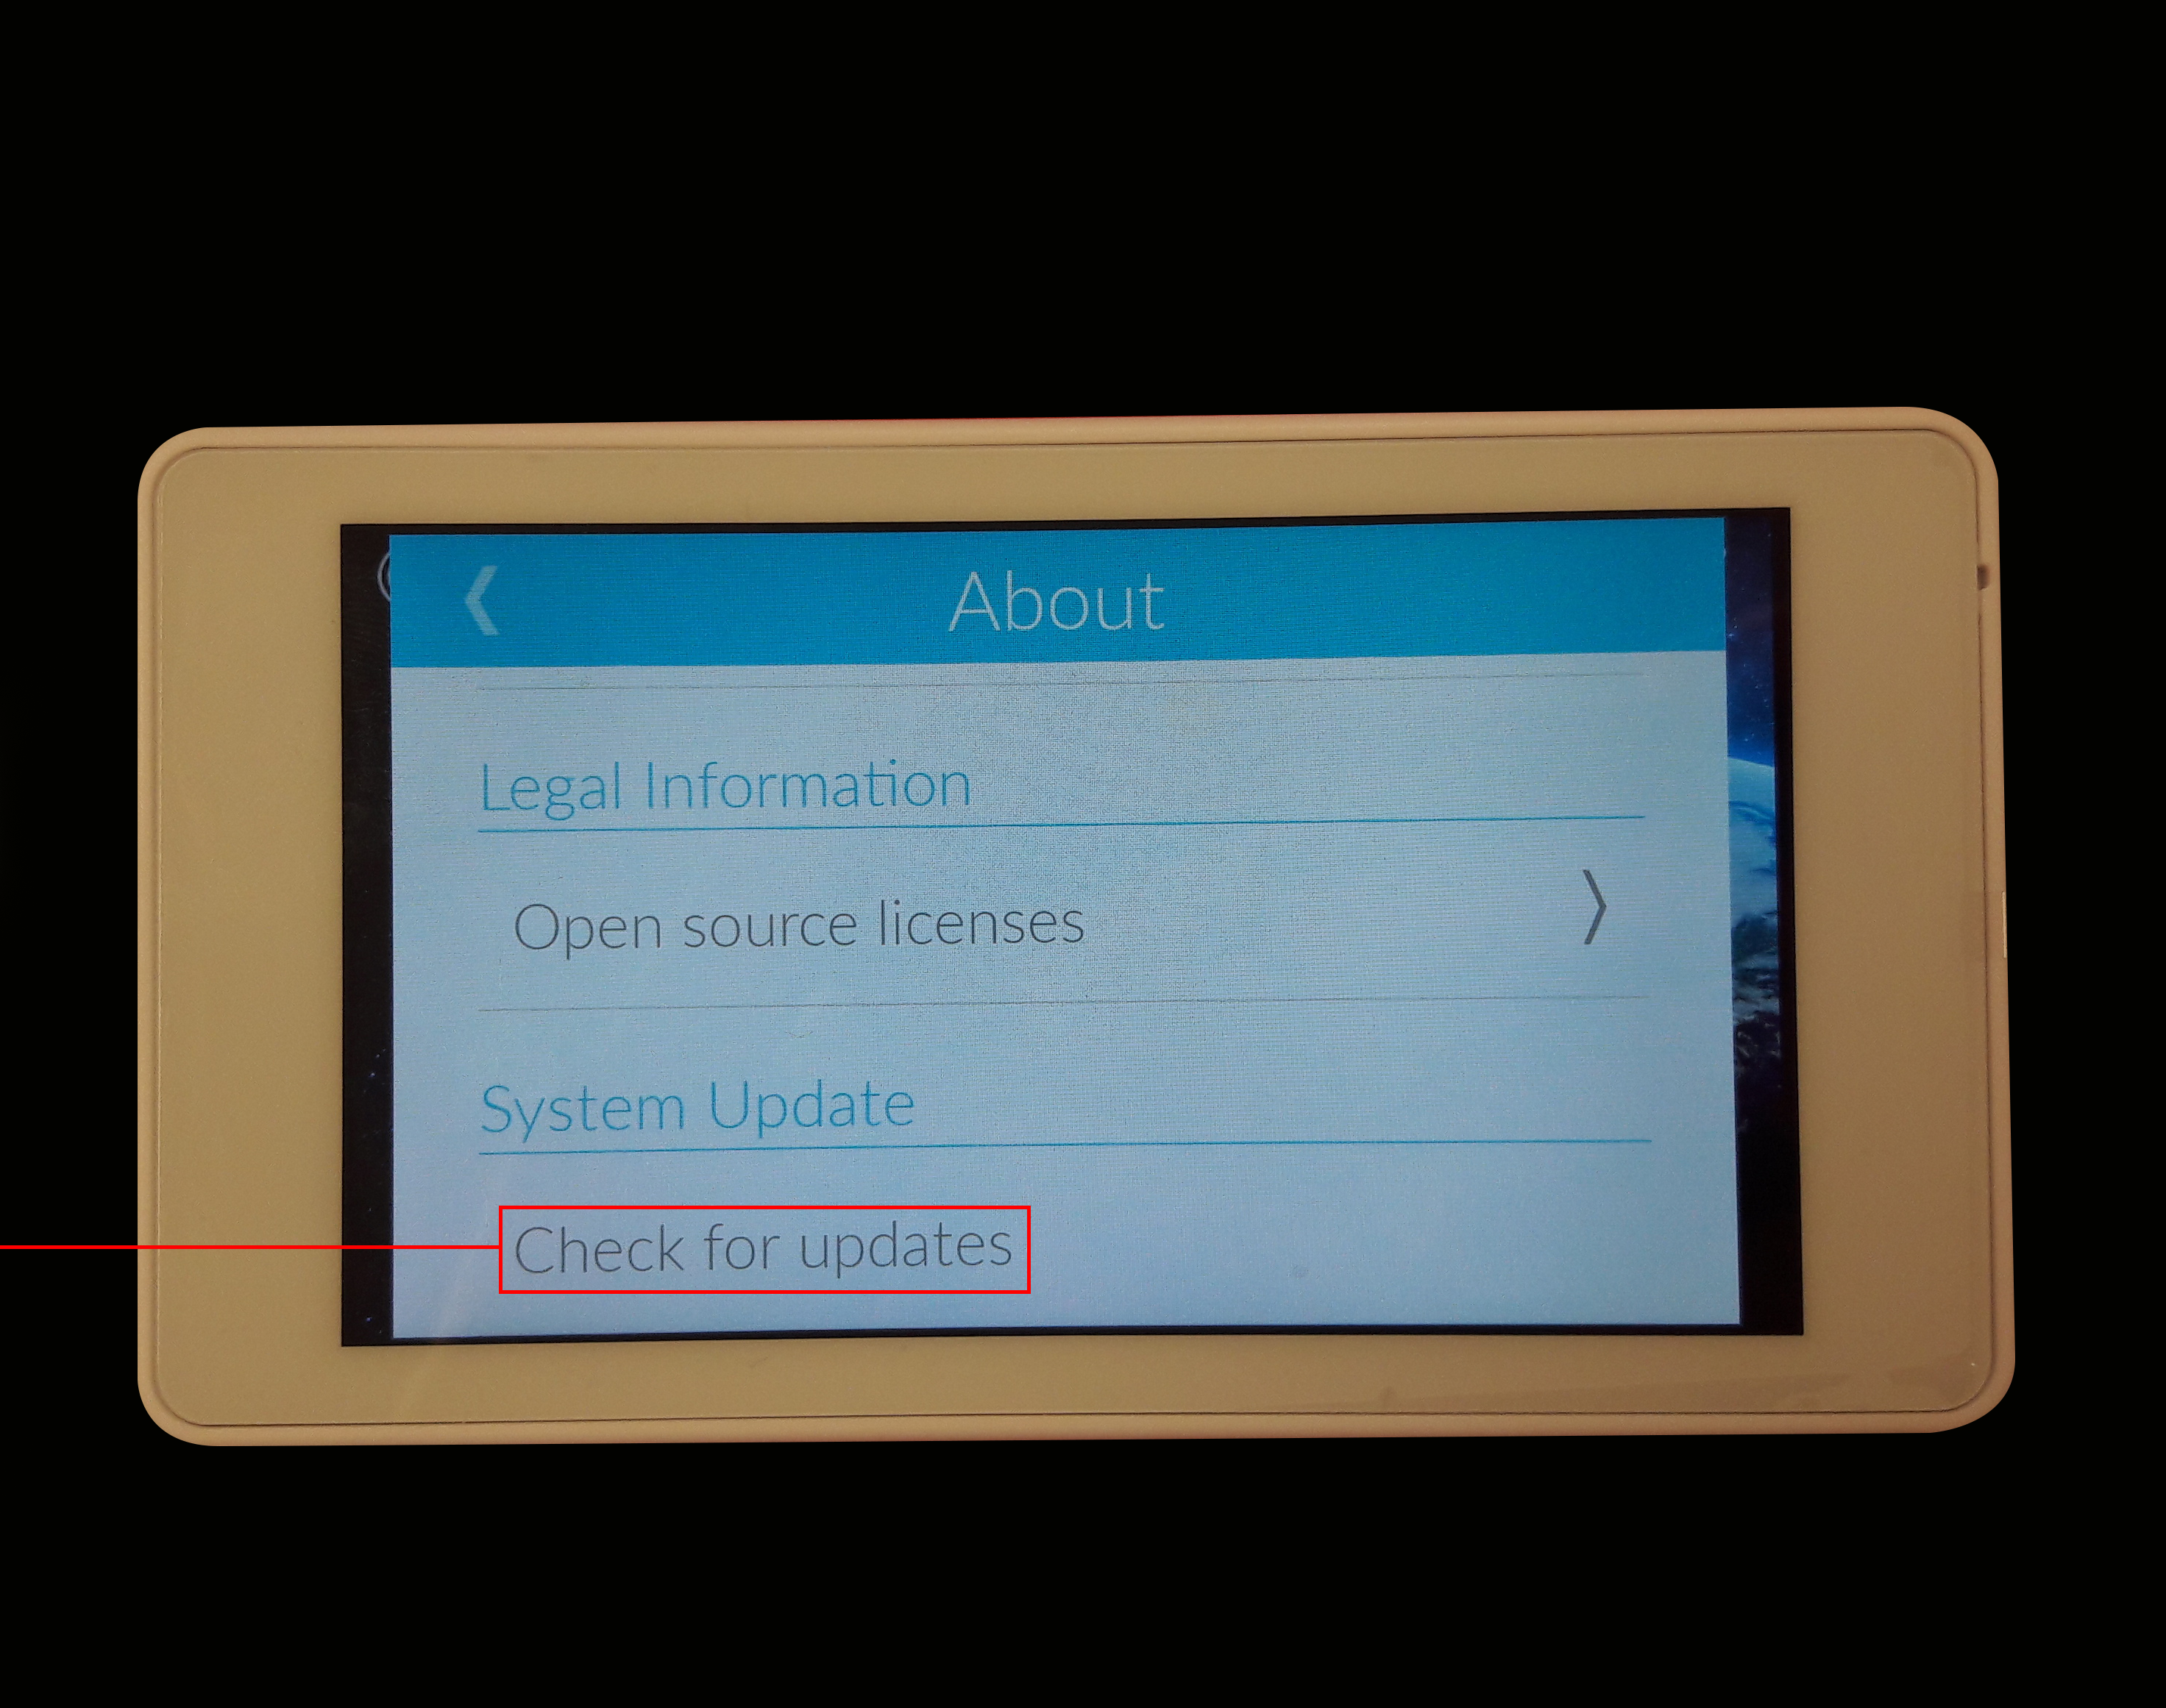
If you do skip this process and want to perform the update after setting everything else up, or you have had the TouchOne installed for some time already, you can perform an over the air update from the settings menu. From the home page press Settings, scroll down and press About.

Once in this menu scroll down until you find Check for updates, press this and the TouchOne will check to see if there is a newer software version available. Choose to install. Your TouchOne is now up to date.